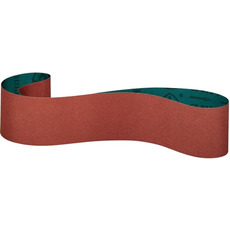
If you own a drum sander, you know how crucial it is to have the right abrasive strips. However, finding the exact size can sometimes be a challenge. One effective solution is to order custom-made sanding belts and then cut the joint to turn them back into strips. This method ensures you get high-quality abrasives tailored to your drum sander's specifications. Here’s a step-by-step guide to help you through the process.
Step 1: Measure Your Drum Sander
First, you need to know the precise dimensions required for your drum sander. The best method is to measure a strip that you know fits on your machine already. If you dont have one to measure then you will have to rely on some math! Measure the length and width of the drum, ensuring you account for any additional length needed for wrapping around the drum securely. Calculate a “spiral wrap” of the width of strip recommended for your sander. Note these measurements down carefully.
Step 2: Select the Right Abrasive Material
Choose the abrasive material that suits your sanding needs. Abrasive materials come in different grits and types, such as aluminum oxide, silicon carbide, zirconia alumina and ceramic. Determine the best abrasive grit material based on what type of product you are sanding. In most cases, Cloth Backed Aluminum Oxide is the preferred choice for drum sanders procssing wood materials.
Step 3: Order Custom-Made Sanding Belts
With your measurements and abrasive type decided, you can now order custom-made sanding belts. The process is quite simple really, just fill out the dimentions on the form page and once you have filled out the width, length and made an abrasive type selecion, you will see the per “belt” pricing and minimum order quantities. When placing your order, ensure you specify the exact length and width you need. Here are a few tips for ordering:
- Material Selection: Choose an appropriate material for the materials you will be sanding.
- Specifications: Double-check your measurements and abrasive type before finalizing your order. It is better to order a little extra length to trim off, than it is to fall short and have difficulty mounting your strips.
- Quantity: Consider ordering a few extra packs of belts to have spares on hand.
The most common choice for drum sanders is 80 grit and 120 grit. These 2 grits give you a nice balance between material removal and initial finishing. For heavy removal you can go down to 60 grit or even 40 grit. Drum sanders typically are not used for finer finishing passes as the full contact drum does create a fair bit of heat in the finer grits. For this reason we recommend you avoid grits finer than 180 grit unless you are very familiar with how these finer grits work in a drum sander.
Step 4: Cut the Joint to Create Strips
Once you receive your custom-made sanding belts, it’s time to transform them into abrasive strips. Follow these steps:
- Identify the Joint: Locate the joint where the belt is connected. This is typically a seam where the two ends of the belt are joined.
- Cut the Joint: Using a sharp utility knife or scissors, carefully cut along the joint to separate the belt into a strip. Ensure the cut is clean and straight.
- Check the Strip: After cutting, verify the strip matches your drum sander's dimensions. Adjust if necessary.
Step 5: Install the Abrasive Strips
With your newly cut abrasive strips, you can now install them onto your drum sander. Follow the manufacturer’s instructions for securing the strips onto the drum. Make sure the strip is tightly wrapped and evenly aligned to prevent slippage during use.
Tips for Success
- Safety First: Always wear safety gloves and goggles when cutting the abrasive belts to protect yourself from sharp edges and debris.
- Maintenance: Regularly check and replace the abrasive strips to ensure optimal performance and avoid damage to your drum sander.
- Storage: Store unused sanding belts and strips in a cool, dry place to prevent degradation of the adhesive and abrasive material.
- Verify Size: Custom made sanding belts are made special for you and are therefore not returnable, so please double check your sizing before placing an order!
Benefits of Custom-Made Sanding Belts
- Precision: Custom sizes ensure a perfect fit for your drum sander.
- Quality: High-quality materials lead to better sanding performance and durability.
- Convenience: Saves time compared to searching for pre-made strips that may not fit perfectly.
By ordering custom-made sanding belts and converting them into strips, you can ensure your drum sander always has the right abrasive material, leading to more efficient and effective sanding jobs. Happy sanding!

 Posted by

