How to Sand Like a Pro: Expert Tips for a Flawless Finish
Mastering Sanding for Woodworking, DIY, and Home Improvement
Many people find sanding frustrating and time-consuming, often rushing through the process and getting poor results. However, sanding can be quicker, easier, and more effective if done correctly. With the right approach and high-quality abrasives, you’ll achieve a professional finish while saving time and effort.
Whether you’re refinishing furniture, prepping wood for staining, or smoothing rough surfaces, this guide will help you sand like a pro. Read on to learn essential sanding techniques, avoid common mistakes, and discover the best sanding products available at onlinesupply.ca.
1. Start with the Right Sandpaper Grit
One of the biggest mistakes beginners make is starting with sandpaper that’s too fine. This can lead to excessive sanding time and frustration. Instead, begin with a coarser grit to remove imperfections, tooling marks, and surface damage quickly. Then, progressively work your way to finer grits for a smooth, polished finish.
Sandpaper Grit Guide:
- 80-Grit – Removes rough spots, deep scratches, and imperfections.
- 120-Grit – Smooths out surfaces after coarse sanding.
- 220-Grit – Prepares wood for staining and finishing.
- 400-Grit – Provides an ultra-smooth surface before applying sealers and topcoats.
Recommended Products:
- Klingspor Abrasives, Carborundum Abrasive & Norton Abrasives – High-performance sanding solutions for wood, metal, and more.
- Sanding Belts, Discs, and Sheets – Available in all grit sizes at onlinesupply.ca.
2. Slow Down for a Better Sanding Finish
Many assume that sanding at higher speeds will get the job done faster. However, excessive speed creates heat, which can:
- Melt the adhesive holding the grit, reducing sandpaper effectiveness.
- Embed grit particles into wood, causing further imperfections.
- Cause stress cracks in some wood types, requiring costly repairs.
For best results, use slow, even pressure and let the sandpaper do the work.
3. Change Your Sandpaper Frequently
Worn-out sandpaper slows down progress and creates inconsistent results. While high-quality sandpaper may seem like a small investment, it saves time and effort in the long run. Replace sandpaper as soon as it stops cutting effectively.
Pro Tip: Use a crepe rubber cleaning stick to remove debris buildup from sanding belts or discs, extending their lifespan and efficiency.
Recommended Products:
- Crepe Rubber Cleaning Stick – Essential for maintaining sanding belts and discs.
- High-Quality Sandpaper Rolls and Discs – Available at onlinesupply.ca.
4. Inspect Your Work Frequently for Flawless Results
Pause often to check for scratches and uneven sanding. Use a bright light at a 45-degree angle to highlight imperfections. If you notice stubborn scratches, they may be caused by buildup on your sandpaper. You can remove the buildup by lightly rubbing coarse sandpaper across it or using a cleaning stick.
5. Test Your Finish Before Applying Stain or Paint
Before applying your final finish, test your sanding results by applying a thin coat of lacquer sanding sealer. This helps reveal any sanding imperfections. If needed, lightly sand the sealer with 400-grit paper before proceeding with your desired finish.
Recommended Products:
- 400-Grit Sandpaper – Ideal for final sanding before finishing.
- Lacquer Sanding Sealer – Prepares wood for a flawless final coat.
6. Use the Best Sanding Tools for Maximum Efficiency
In addition to using the right sandpaper, choosing the best sanding tools can significantly improve your results. Consider:
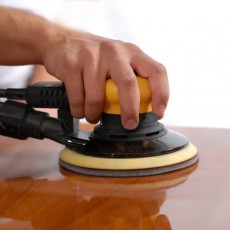
- Orbital Sanders – For smooth, swirl-free finishes.
- Belt Sanders – For rapid material removal on large surfaces.
- Hand Sanding Blocks – For greater control on detailed work.
Find professional-grade sanding tools and supplies at onlinesupply.ca.
Conclusion: Sand Like a Pro with the Best Products and Techniques
Sanding doesn’t have to be frustrating or time-consuming. By using the right grit progression, techniques, and tools, you can achieve a flawless finish on any project.
Visit onlinesupply.ca for top-quality sanding belts, discs, sheets, and accessories to make your sanding projects easier and more efficient.
With the right approach, you’ll enjoy a smoother, faster, and professional-quality finish every time!

 Posted by

